Note: This post deals specifically with how to apply professional best practices to your photo editing process, not general info about how to edit photos in GIMP.
Many editors get their first taste of image editing using free software like GIMP. The learning process can be long, although hopefully, the team here at TheGimpTutorials.com has made things a bit easier for you.
Eventually, though, you’ll probably wonder if you can take your newfound skills into the world of professional image editing.
Time for an uncomfortable truth: GIMP isn’t well-suited to meeting professional-level editing standards.
It’s great for the casual home user and the enthusiast photographer, but there are some key elements that are missing: fully non-destructive editing, support for the CMYK colorspace used in printing, preset actions, batch processing, and official technical support are just a few of the missing features that will put you at a major disadvantage in the professional world.
GIMP simply isn’t used by professional image editors. You could probably find a few dedicated pros in the open-source community who insist on using free software for their images, but the vast majority of professional image editors use paid software for their editing work.
In some cases, you can produce professional-quality results, but it will take you far longer than it should.
If you’re absolutely committed to getting the best possible edits out of GIMP, I’ll show you some basic steps that are essential for getting professional results – but if you’re truly committed to achieving professional-grade editing, you should fork out the $19.99 USD per month for the Creative Cloud Photography plan from Adobe.
The CC Photography plan bundles together Photoshop (including the iPad version), Lightroom, 1 TB of online storage, technical support, access to Adobe Fonts, and regular app updates – and if you’re making money from your image editing, the subscription price counts as a business expense.
The amount of money that you’ll save by using free software will be immediately counterbalanced by the extra time and effort that you’ll spend recreating essential features and processes available in just a few clicks when using professional software.
For those of you who are avoiding Adobe because you’re not a fan of the subscription model, there are still some far more effective options available through single-purchase licenses such as Affinity Photo, DxO PhotoLab, and Capture One.
With that out of the way, let’s take a closer look at some of the essential elements of professional image editing that many other tutorial sites don’t tell you about.
Quick Navigation
1. Calibrate Your Monitor
One of the biggest problems that new editors overlook is the quality of their computer display. Despite what we would all like, some monitors display wider color ranges than others, and there are even some variations between different monitors of the same model due to the quirks of manufacturing.
The importance of a monitor that is guaranteed to show accurate colors cannot be overstated. Otherwise, you could find yourself spending hours finessing a single image to perfection, only to find out that it looks completely different when viewed on a properly calibrated device.
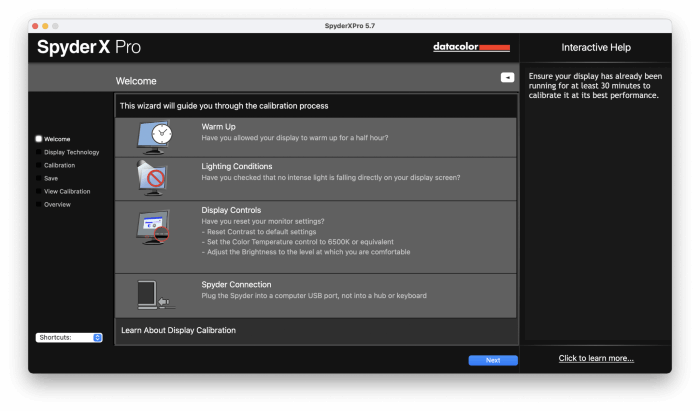
This makes it absolutely essential to use a color calibration device if you’re going to edit images professionally. Color calibration devices, or colorimeters as they’re sometimes known, are placed over the monitor panel and connected to the computer through a standard USB cable.

Image Source: datacolor.com
The accompanying software package displays a series of known colors on the screen, and the colorimeter measures what color is actually displayed by your monitor. The software then develops a calibration profile specific to your individual monitor that adjusts its display output, ensuring that the colors you see on the screen are correct.
I’m currently using a SpyderX from datacolor, but there are plenty of other fine choices available – all that really matters is that you use some kind of color calibration device. There are devices to fit almost any budget, and even a monitor calibrated with a cheap colorimeter will produce more consistent results than an uncalibrated monitor.
Trying to do this manually is a waste of your time, so please, for your own sake, don’t convince yourself that you can fix it by eye. Trust the calibration device. Even Apple monitors, which are famous for their excellent color range, can benefit from proper calibration.

Once you’ve got your monitor calibrated, pay careful attention to the light sources in your editing room. Even if your monitor is calibrated properly, changes in ambient light in the rest of the room can make a big difference in how colors appear to the human eye.
Ideally, your monitor will be the only light source in your editing room during the editing process, although this is probably impractical for most non-professionals. It can be very helpful when finalizing the color on a tricky image, though!

Last but not least, display outputs can change over time, so it’s a good idea to recalibrate your monitor regularly. Most of the software packages have built-in reminders to help you stay on top of this.
2. Shoot in RAW mode
If you’re going to be editing your own pictures, you’ll definitely want to be photographing in RAW mode. RAW files are a direct capture of the image data from your camera sensor, without any additional post-processing inside the camera.
This gives you the highest degree of flexibility later in the editing process, without any unwanted generic compression settings.
GIMP doesn’t actually support RAW photos natively, so you’ll need to install a third-party plugin. My personal preference for RAW support in GIMP is the open-source program RawTherapee, which you’ll have to download and install separately.

Once you’ve got it installed, whenever you try to open a RAW image in GIMP, it will first open RawTherapee in a window. You’ll make all your non-destructive adjustments, and then RawTherapee passes the processed image to GIMP for further editing.

RawTherapee isn’t the only RAW processor available for GIMP, but it’s close – the only other really viable option is a similar program called darktable. The third option, nUFRAW, is more of a technical demonstration that is not ready for the professional end-user – if you can even get it working at all.
3. Use Non-Destructive Techniques
Once you’ve gotten a taste of non-destructive editing with RawTherapee, you’ll see how useful the process can be. GIMP doesn’t yet have the capabilities to allow for a fully non-destructive workflow, but there are a few things you can do you do to preserve as much of your original image data as possible:

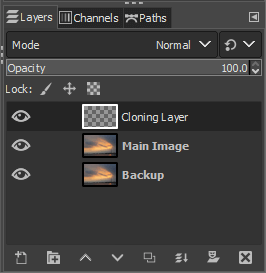
- Work on a copy of your image. When you open your image in GIMP, duplicate the main image layer and edit that copy, instead of the original. This can save you time if you decide to change directions or if you need to restore a part of the unedited image.
- Use cloning layers. When using the Clone and Heal tools, it’s best to place all the cloned content on a new separate layer, so that your original image stays untouched underneath. It’s easy to pass your Undo limit while cloning, and keeping your cloned content separate from your source content can make it easy to adjust your edits later on in the editing process.
- Use layer masks. If you just want to apply an adjustment to a portion of your image, it’s often simplest to apply the edit to a layer containing a copy of your original image (see point 1) and then use a layer mask to hide the parts of the layer you want to leave untouched. It’s not quite as good as using layer masks with adjustment layers, but it’s as good as you can get in GIMP.
4. Develop a Personalized Workflow
Once you’ve familiarized yourself with GIMP, calibrated your monitor, configured your camera for RAW shooting, and practiced your non-destructive editing techniques, it’s time to turn all that into a more consistent process: your own individual workflow.
This helps you to produce consistently high-quality results by ensuring that no editing step gets left out of any image.
Workflows are very personal and every image editor has its own approach, so I won’t tell you exactly how you should set yours up, just that you need one.
You can write it down if you’d like, but I find that it’s generally easiest to start with broad, whole-image adjustments and work your way down until you’re doing spot healing and other small-scale edits.
Just remember – sharpening always comes at the very end of the workflow, not before!
5. Prioritize Efficiency
If you’ve hundreds of photos to edit from a single shoot, you’re never going to finish your work before your deadline if you have to repeat your entire editing workflow manually for each image.
Ideally, this means that you’ll use editing presets in your chosen RAW processor (such as RawTherapee) to apply a general baseline adjustment, and then assess each image to see what additional edits are necessary.

But there’s more to efficiency than just having a consistent workflow. Learning the keyboard shortcuts in GIMP can make a huge difference in your editing speed, and can make you a better editor.
Stopping what you’re doing to change tools can seriously interrupt your flow, so it’s faster and easier to simply get used to using keyboard shortcuts.
Many useful tools don’t have a shortcut associated with them by default, but it’s possible to customize them by opening the Edit menu and selecting Keyboard Shortcuts. If you find yourself using a certain feature over and over again, give it a shortcut to speed things up.
A Final Word
Without a doubt, GIMP is an amazing image editor. It’s useful for a wide range of personal projects, and its value to the open-source community is undeniable. But when it is placed in a professional context, it comes up a bit short in some essential areas.
The next version of GIMP should address some of these issues, but during the same time period, paid competitors like Photoshop will have developed and released many new versions, each with impressive new features that GIMP may never be able to duplicate.
The GIMP development roadmap outlines some of what we can expect in the future, but you’ll note that non-destructive editing isn’t expected until version 3.2, which is at least two release cycles away from where we are now – and there’s no guarantee it will actually be included.
By comparison, Photoshop added support for non-destructive adjustment layers nearly 10 years ago.
About Thomas Boldt