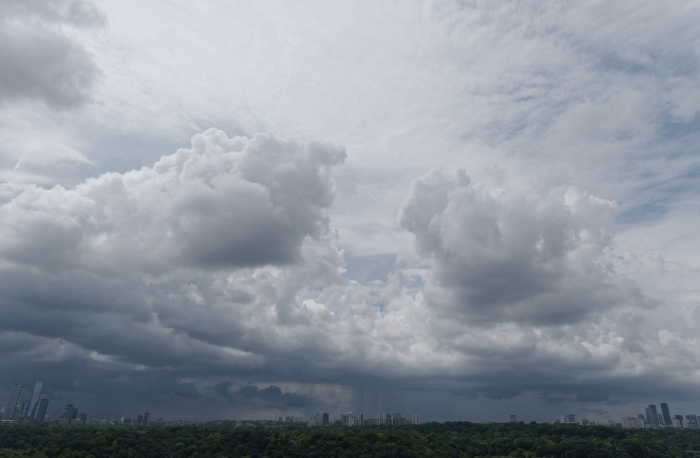
Many new image editors focus heavily on the color in their images, without thinking about the basic structure of the image at all. Highlights and shadows help us focus on form and shape, which is why many photographers spend time working exclusively with black and white imagery.
But what can you do with an image in GIMP once the shutter has already been clicked? Almost anything! You certainly don’t need to be stuck with the existing tonality, and GIMP provides a huge range of tools to help you brighten and darken an image – but they’re not all created equal.

Many editing tutorials go for the most obvious basic adjustment tools: Brightness/Contrast and Levels, but these tools are sort of like using a sledgehammer when you really need microscopic tweezers. You could use them, but you won’t get the kind of subtlety that comes from using the proper tool: Curves.

Quick Navigation
The Quick Guide to Brighten and Darken an Image in GIMP
If you’ve used Curves in another program like Photoshop or you just need a quick reminder of the basics, here’s how to use Curves in GIMP:
Step 1: Open the Color menu and select Curves.
Step 2: Click along the white diagonal line to create adjustment points at various tone sections. Move a point up to brighten the selected tones within the image, or move a point down to darken the tones.
You’ll need to be careful about where you place your points, how many you place, and how extreme your adjustments are. Too many points with huge adjustments can completely ruin an image, but the right touch can turn a good photo into a masterpiece.
That’s the fastest possible introduction I can give you to using Curves to brighten and darken an image in GIMP, but there’s a lot more to it! Read on for a more in-depth explanation of the Curves tool and how you can use it to make your images really pop with contrast.
Lean into the Curves
I’m going to be honest with you from the start: Curves can be a bit confusing at first until you get the hang of how it works.
I had a colleague many years ago who fought with it constantly until one morning he came into the office and told us that he had a dream about how it worked, and suddenly he could use it much more intuitively – even as a tool for adjusting color using specific channels, which I still find deeply frustrating.
I’m still waiting on my epiphany, but we can rely on practice in the meantime. Hopefully, I can do a better job of explaining it to you, although there is something to be said about the processing power of the human subconscious – and a lot of experience and practice.
Understanding the Histogram
The most important part of the Curves dialog is the histogram, which is shown in the background behind your adjustment line. Histograms are used throughout the world of image editing, so it’s a good idea to get used to reading them and working with them.

If you’re not already familiar with the concept, a histogram is a graph that describes the tonality of your image. The left edge of the graph represents pure black and the right edge of the graph represents pure white, with all the levels of grey in between. The height of the graph at any one point shows how much of the image contains that corresponding tone.
GIMP adds a helpful gradient along each axis of the histogram in the Curves dialog, which really helps to understand the concept.
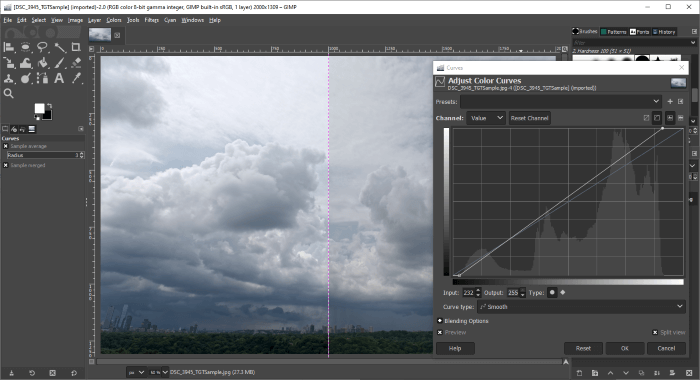
In this example, you can see that there are no pixels that fit into the very brightest range of the histogram (highlights) and also no pixels that fit into the very darkest range (shadows). In order to give the photo some pop, we’ll have to correct this too – good thing Curves can do it all!
Brightening and Darkening Your Image With Curves
Hopefully, you’ve started to form an idea of how the tool works, so let’s get down to the nitty-gritty, shall we? In this example, I’ll take you through the process that I use to give flat images some contrast pop.
Step 1: Getting Started
Open the Color menu and select Curves. Not much to this step 😉

Step 2: Set Your Limits
The sharp-eyed editors among you may have noticed that the Curves adjustment line already has two points set, even before you add any of your own. The points are at each end of the line and are used to set the black point and the white point of your image.

The histogram in the background shows us that this image has almost no bright white pixels, and almost no dark black pixels either, which creates a flatter-looking image. By adjusting the two existing control points at either end of the line, I can push the brightest pixels in the image into the range of pure white, and the darkest shadows into pure black.

It is not essential to adjust these for every image, but it’s a good idea to experiment with them while you’re still learning how the Curves tool works. You’ll have to be the judge if the effect is right, so be sure to make good use of the Preview and Split View options to see your results before finalizing them.
Step 3: Contrast Tweaks
One of the most common methods for brightening and darkening an image is the “S-curve”. The idea is to modify your adjustment line into a gentle S shape by keeping the mid-tones in place while darkening the shadow areas and brightening the highlight areas.

Again, this doesn’t work for all images, but it’s a good place to start. You’ll get more comfortable assessing what each individual image needs as you get more practice. Sometimes, the “right” choice isn’t one that matches your artistic vision, so don’t feel limited by this guide, but trust your eye.
If you’re not sure where to begin your adjustments, you can also move your mouse cursor over the main image window and a line will appear in the Curves dialog showing you the matching area. Hold down the Shift key and click to set an adjustment point for those tones.

Be careful when adding your points and making adjustments, though. Start slow, and always be ready with your Undo command. You can also select adjustment points within the Curves dialog and delete them using the Delete key if things get too weird!

Also, one last important note! GIMP doesn’t support non-destructive Curves adjustments or adjustment layers, so once you click the OK button, your changes are saved permanently to the file. You can use the Undo command, of course, but you’ll have to make all your adjustments first using the tool since you can’t edit them later.
Advanced Curves Using Color Channels
If you want to get extra fancy with Curves, you can start using them for brightening and darkening individual color channels, instead of adjusting all of them at once as I explained above.
Digital images on a computer are typically stored in an RGB format, which means the image contains a Red channel, a Green channel, and a Blue channel. Each channel is actually a black-and-white image, where white corresponds to the pure hue of the channel’s assigned color.
So in the Red channel, the white pixels represent pure red, and in the Green channel, the white pixels represent pure green, and the same applies to the Blue channel. The three channels get combined to form the standard RGB images we all know and love.
This is not my chosen method for adjusting the hue in an image, but it does have some technical uses where color accuracy is absolutely essential – or desirable.

All you have to do is adjust the Channel setting above the main Curves histogram to adjust a specific color channel (or even the alpha channel, if you have one, though this could create some very unexpected results).

If you want to reset your adjustments, you can click the Reset Channel button to return any channel to its original unedited state.
A Final Word
While there are lots of ways to brighten and darken an image in GIMP, Curves is the best way that I’ve found. It’s a popular tool that’s used across a wide range of programs, so it’s a very useful tool to know and understand. I learned to use it in Photoshop, but it’s nice to see a familiar friend in GIMP.
The process of adjusting highlight and shadow is a complex one, and you’ll need a lot of practice to get really good at it – but now you know how to get started, so have fun!
About Thomas Boldt