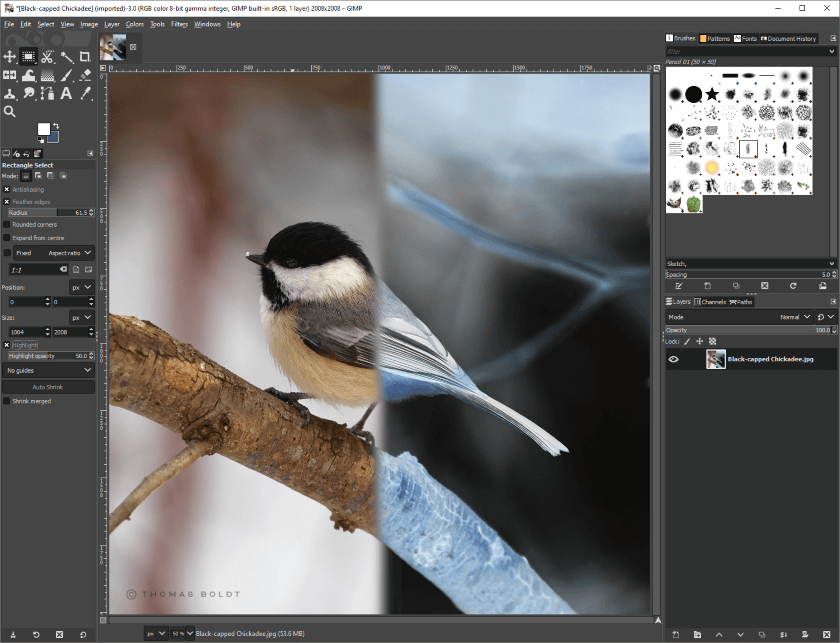
If you’ve ever looked at the negative of a film photograph, then you’re probably already familiar with the ghostly colors and strange hues that are the hallmarks of inverted colors.
Of course, film photography is very rare in the modern world, but that can make the impact of the inverted color effect much more dramatic because it’s unexpected.
As they say, everything old is new again.
Inverting colors in GIMP can be useful if you’re working with old film negative scans, for recreating the look of film negatives, or even just for a cool visual effect in a larger composition. You can also invert the colors of a layer mask to flip the visible and transparent areas of the mask.

There are three primary ways to invert colors in GIMP: the Invert command, the Linear Invert command, and the Value Invert command.
Unfortunately, none of these commands have keyboard shortcuts in the default configuration, but if you need to invert colors regularly, you can assign a shortcut by opening the Edit menu and clicking Keyboard Shortcuts.
Many users who are used to other image editors try to use the Ctrl + I keyboard shortcut, but in GIMP, this shortcut runs the command Invert Selection, which can be confusing at first!
Here’s how you can invert colors in GIMP properly.
Quick Navigation
A Basic Color Invert
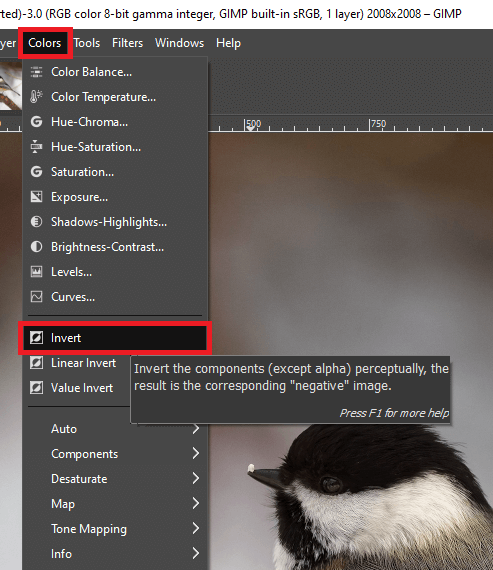
To invert colors in GIMP, open the Colors menu and select Invert. You’ll need to have an image open first, of course!

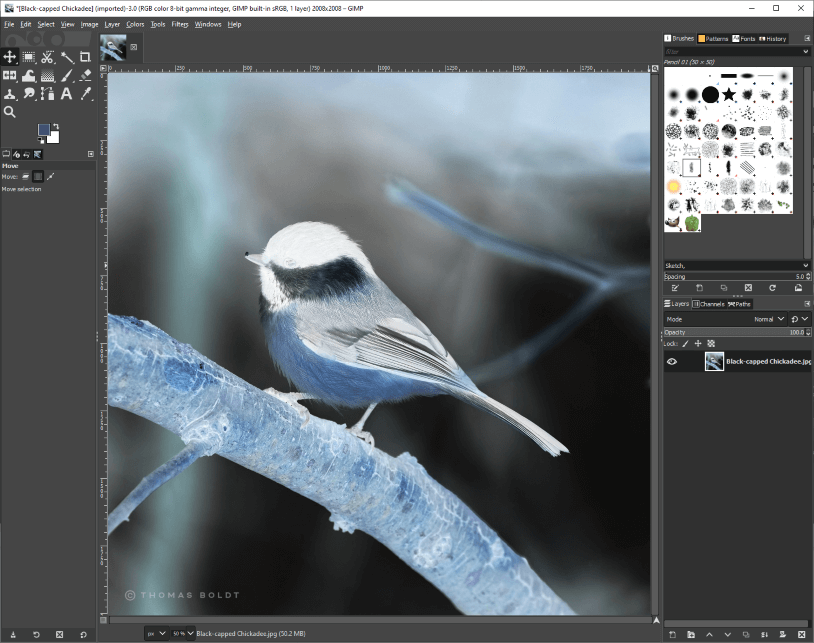
That’s all there is to it! Every pixel of your image will be converted to the opposite hue on the color wheel, and the brightness value will also be inverted so that light areas become dark and dark areas become light, as you can see below.

This can give a weird interdimensional alien vibe to a photo of a cute little songbird, and things get even stranger when you apply the Invert effect to a landscape or to a portrait!
Linear Invert
The Linear Invert command is a bit complex to explain since it uses linear light calculations instead of perceptual calculations, and I’m a bit unclear about the difference between the two.
I can’t seem to find a straightforward explanation of the difference between the two, but if you’re working on a project where you need to know the difference between perceptual and linear, you’re already beyond the scope of this tutorial 😉

Amusingly enough, the tooltip popup that appears in GIMP when you hover over the Linear Invert command has more information than the official GIMP documentation for the Linear Invert command, as you can see below:

The end result is still an inverted image, but as you can see below, the inversion is much softer, without the large dark areas that appear when using the standard Invert command.

If you can explain the difference between the two in the comment section in a straightforward manner, I’d really appreciate it! None of my research seems to give a clear answer without requiring a high degree of technical knowledge.
Bonus: Exercise Those Goats!
If you’ve ever looked at the Filters menu in GIMP and wondered about the last filter in the list, you’re not alone! The filter intriguingly named “Goat-exercise” actually applies a Linear Invert command to your selected layer.
It was originally intended as a demonstration of a particular scripting feature, but the name became something of an in-joke among the developers, and so it lives on in the Filters menu with absolutely no explanation.
Value Invert
Value Invert is much simpler to explain than Linear Invert, which is good because it also has an empty entry in the GIMP documentation!

As you might guess from the name, Value Invert only inverts the value (also known as brightness) of the pixels in your image, but it doesn’t change the hue.
However, the colors of your image will definitely be changed from their original appearance! This can give a strange-looking result, but sometimes that’s a benefit in the world of image editing.

It’s almost spooky than the results of the basic Invert command!
Inverting Colors on a Layer Mask in GIMP
If you want to apply these invert commands on a layer mask, it’s just as easy as applying them to a pixel layer! Select the layer mask thumbnail in the Layers panel, as shown below, and then apply the Invert command as normal.

I’d recommend that you use the standard Invert command since the others might produce unexpected results.
Troubleshooting: Why Can’t I Invert Colors in GIMP?
If the Invert option is unavailable or not working as expected, check the color mode of your document by opening the Image menu and selecting the Mode submenu. The Invert commands only work properly if your image is in RGB or Grayscale color mode.

Officially, the GIMP documentation says that the Invert commands will be unavailable if your image is in Indexed mode, but my testing shows that the commands can actually still be used.
I assume that’s a bug because if you apply any of the Invert commands and then apply the same command again to the inverted results, you should return to your original image colors, but that’s not the case when you apply them in Indexed mode.
If your image is in the Indexed color mode, you’ll have to convert it to another color mode to get the expected results from the Invert command. Open the Image menu, select the Mode submenu, and choose RGB or Grayscale.
A Final Word
Congratulations, you’ve learned how to invert colors in GIMP using several different methods! I find that I mostly use the Invert command when I make a mistake setting up a mask, but many other projects can benefit from a quick color inversion.
The days of film photography are mostly gone forever now, but at least the film’s negative effect can live on in the digital world.
Happy inverting!
About Thomas Boldt
Dan Lewis
Many thanks for this – the troubleshooting tips worked 🙂