Removing a background to leave a transparent frame is one of the most common jobs for image editors. Whether you’re prepping your image for a website layout or a photorealistic collage, here are a few of the best ways that you can remove a background in GIMP and make it transparent.
The basic process to remove background is the same, no matter which method you choose:
- Step 1: Open your image and add an alpha channel.
- Step 2: Isolate your subject with a selection.
- Step 3: Remove or hide the unwanted background areas
- Step 4: Save as a PNG file or another format that can handle transparency.
Those are the general principles, but there are a few different ways to handle each step. A lot of your choice will be determined by the image you’re editing since each method produces a different result depending upon the content and structure of the image you’re using them on.

I’ll walk you through each step, why it works the way it does, and the different ways you can accomplish each one.
Quick Navigation
Step 1: Adding Transparency with an Alpha Channel
Typical computer images are made up of three color channels: a Red channel, a Green channel, and a Blue channel. Each channel is just a grayscale image, but depending on which channel it represents, white pixels display as the channel color and are combined to make a normal image.
In order to add transparency to our image, we need to make sure it contains a fourth channel called an alpha channel. Alpha channels are also just grayscale images, but instead of representing red, green, or blue, any white pixels it contains are treated as transparent.
There are two ways to add an alpha channel to your image. The simplest way is to open the Layers menu from the menubar, select the Transparency submenu, and click Add Alpha Channel. If the option is unavailable, your image probably already has an alpha channel.

Alpha channels are created automatically once you add multiple layers to an image because transparency is an essential element of how the layer compositing works, so that may have taken care of things for you already.
Step 2: Isolate Your Subject With A Selection
This part of the process is by far the most time-consuming and fiddly. It’s simple enough if you’re working on a photo of a plain plastic cube, but as soon as your shapes get more complex, the time investment grows rapidly. Selecting single strands of hair may come to haunt your dreams.
Fortunately, there are some helpful tools that can make the process simpler and far less stress-inducing. You can also combine them to get the results you need without doing everything by hand. Holding down the Shift key adds to your existing selection, while the Ctrl key subtracts.
Creating Selections the Quick Way
The fastest way to create a selection around your subject is to use the Fuzzy Select Tool. This is GIMP’s name for a “magic wand” type of selection tool that automatically selects all pixels within a specific color range of the first color your click on. Sounds pretty useful, right?

Well, for the most part, it’s very helpful when used on the right image – but it can also run into trouble fairly easily. The only real control you have over the final selection comes from adjusting the Threshold setting in the tool options, which determines the size of the color selection range.
Since it’s so fast, it’s often worth giving it a try just to see if the results are usable. Try experimenting with different threshold options and different initial click locations. If it won’t work properly, you might still get a good starting selection that can be refined with the other methods.
Using the Foreground Select Tool
If the Fuzzy Select tool didn’t get everything perfect, you might have better luck using the Foreground Select tool. It’s an interesting combination of precision and generality, and it’s a bit hard to use at first, but with practice, it starts to feel like second nature.
Start by choosing the Foreground Select tool from the toolbox. This tool has a few stages, but they’re fairly simple – and GIMP puts tooltips at the info panel along the bottom of the editing window to give you a bit of prompting.
The first step is to roughly outline your subject – with an emphasis on the word roughly. All you want to do is define the area that GIMP will be processing and then press the Enter key. The background areas turn dark blue, and your rough selection area turns light blue (see below).

Your cursor will also swap to a paintbrush, but all your need to do is identify the different colors that you want GIMP to outline. You don’t have to actually cover the entire subject, just make sure that you cover as many of the subject’s colors as possible so GIMP knows what you want.
You can adjust your brush size as needed using the [ and ] square bracket keys, but remember that you don’t need to follow the edges too precisely, it’s more about showing GIMP the colors contained in your chosen subject.
Even a quick, clumsy outlining job like this can produce impressive results, but you get out of it what you put into it – more care and attention during the outlining process produces a better and tighter selection once the tool is finished.
Using Paths to Create Selections
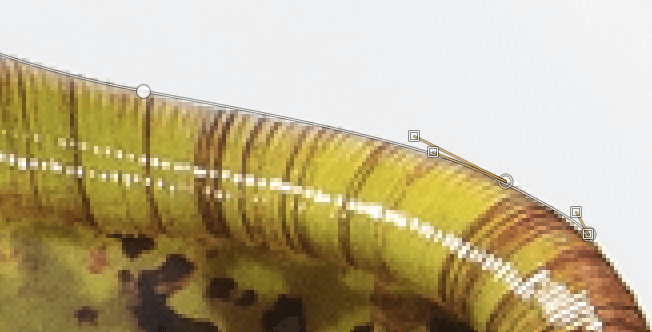
Another method for creating selections uses the Paths tool, which creates a Bezier curve on top of your image that can be edited and manipulated as many times as you want without changing the rest of the content of your image.
Switch to the Paths tool in the toolbox, and click on your to create individual control points. Two points connect to form a line, and the handles are used to define the shape of any curves you’ll need. Add as many points as you need, then open the Select menu and choose From Path.

Paths are not a method I recommend, but you might find them more to your taste. Some people swear by them, but I find that matching a path to a pixelated edge is very difficult to do precisely enough to satisfy me and produce a consistent result.
Finalizing With the Free Select Tool
If all else fails, you can use the Free Select tool to put the finishing touches on your selection, but this can be extremely tedious and painstaking work to do by hand. If this gets too frustrating, you might want to skip ahead to the section on layer masks below, which lets you use brush tools.
Bonus Method: Color to Alpha
If you’re lucky enough to have your subject set against a solid color background, you can make this whole process extremely simple using a tool you may have noticed while you were adding your alpha channel: Color to Alpha, located in the Layers menu, in the Transparency sub menu.

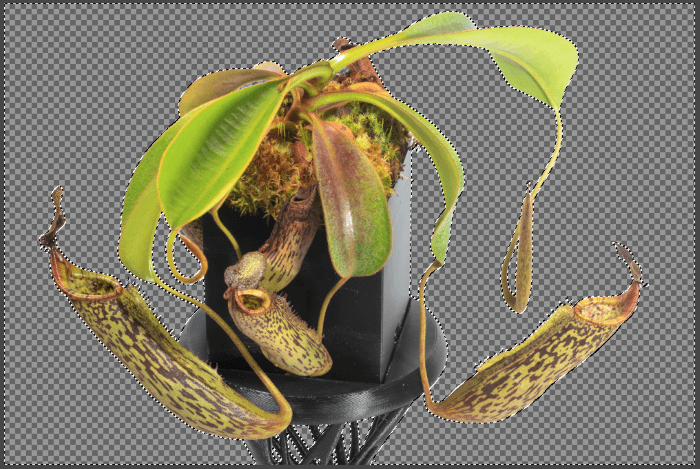
Closer inspection reveals that while the tool did manage to remove all the white in the background, it actually removed all the white in the entire image, including the specular highlights on the leaves and pot. While it’s not perfect, it can still be a great option in your selection toolbelt.
Step 3: Remove or Hide Unwanted Background Areas
Once you’ve created your selection, it’s time to get rid of all that unwanted content! You can simply press the Delete key, and anything you’ve got selected will disappear. The checkerboard pattern that appears is used to define the transparent area of an image, not actual image data.
You might discover that your selection area is perfect, in which case you can move on to Step 4 to save your file in the PNG format. If your selection could use some additional work, undo the Delete command and try using a layer mask to refine your selection using paintbrush tools.
Using Layer Masks
Some people recommend using channels as layer masks to create selections, and it can be a very helpful technique for selecting fine details such as hair strands and pet fur, but I’ve always found it to be hit-or-miss. If your image doesn’t have the right color balance, it doesn’t work well.
I also like using layer masks, but I prefer to use them as a way to store and refine your selection to ensure you get the best possible result. It can often be hard to tell if a selection line is going to produce an acceptable edge, but working with a layer mask allows you to review and then adjust.

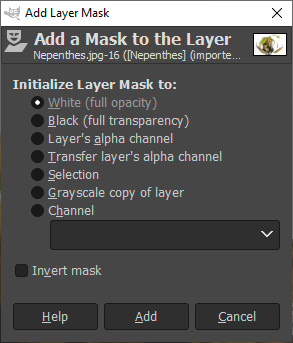
Add a layer mask by right-clicking on your main layer in the Layers palette and choosing Add Layer Mask. Select the new layer mask icon in the Layers palette, then with your background still selected, choose the Bucket Fill tool, and fill the entire selection with black to hide it completely.
Now you can use the Paintbrush tool to adjust your mask as much as you want. Painting white pixels will make that section of the image opaque, and painting black pixels will make it transparent. Tweak your brush settings as needed, and use as many undo steps as you want!
Step 4: Export Your Image as a PNG File
Last but not least, we need to save our image file using a format that supports alpha transparency, such as the PNG format. PNG format, which stands for Portable Network Graphics, is by far the most popular format capable of storing alpha channels for use online.

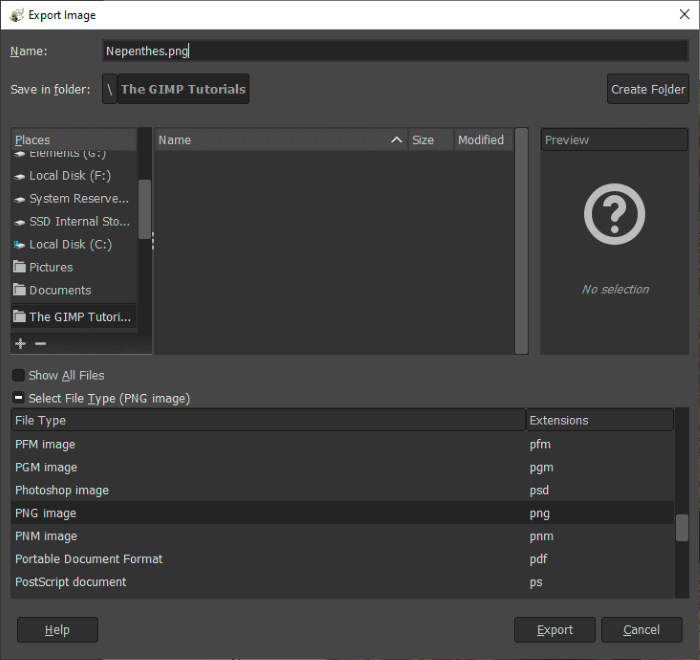
Open the File menu and choose Export As. Click the small + icon beside Select File Type at the bottom of the Export As window. Scroll to find PNG image in the list, name your file anything you want (notice the PNG file extension gets added to the name automatically), and click Export.
The final step is to configure any PNG options that you might want to adjust. Typically, the default settings are fine for storing transparency, and even the default compression setting is at the highest level. If you want to learn more, I wrote a guide about compression levels in GIMP.
A Final Word
I was going to write “that’s all there is to removing backgrounds in GIMP and making them transparent!” but that’s not exactly true. This kind of work can be very time-consuming, and while it’s easy to learn the basics, it can be tough to truly master the skill in all its variations.
If everything went smoothly, then hey, give yourself a pat on the back – but if things turned into a bit of a mess, don’t feel bad. It takes time to get used to the tools and how they can work together, but if you keep practicing, you’ll be a GIMP image editing pro before you know it.
Happy editing!
About Thomas Boldt
Gary Rathbun
It worked great, Thomas — thanks very much for the clear explanations!
Aiko
Color to Alpha seems like the simplest way to remove the background especially a white one. Thanks for the lessons, Thomas! I used PhotoShop in Uganda until I discovered GIMP and never looked back; no regrets…
Abernathy Nabag
Thomas, I know you try to keep these articles short and simple, but I’m surprised you didn’t mention Quick Mask, which is easier and faster than using layer masks. I hope you write up a tutorial on it so that more people can learn about this useful technique. Here’s a summary which you can feel free to build upon, if you’d like.
* * * *
You toggle Quick Mask by hitting shift + Q or by clicking its icon which is a square in the lower-lefthand corner of the window, underneath the ruler.. Once Quick Mask is on, you’ll see that everything that is selected is now tinged red. Paint in black or white to add or subtract from the selection. Press shift + Q again when you’re done. Easy-peasy!
[TIP: If you find yourself switching between black and white frequently, use the keyboard shortcuts. ‘d’ for default black/white color and ‘x’ to swap foreground/background.]
Another super feature of Quick Mask is that you can do a Bucket Fill to select a contiguous region. You just need to make sure to check the “Sample Merged” box in the Bucket tool options. This gives you the ability to quickly select broad areas of a single color, but without the downside of selecting that color everywhere in the image.
[TIP: Did bucket fill leave tiny little islands in the middle of your selection? Sure, you could paint over them but there’s an even faster way. Just use the “Select → Remove Holes” plugin.]
[Bonus Quick Mask Tip: Having trouble seeing what is selected and what isn’t? Right click on the Quick Mask icon (in the lower-lefthand corner underneath the ruler) and you’ll be able to switch whether the foreground or background is masked and choose a different color for the mask.]
Thomas Boldt
Hi Abernathy, thanks for including that extra technique and helpful tips! You’re right that I probably should have mentioned quick masks. At one point in the post, I even refer to a layer mask section that doesn’t seem to have made it into the final published version. I’ll go back and check to see what happened.
Thanks again!
Dan Urbauer
Hi,
I have a restaurant menu that has a yellow background colour with a lot of black foreground text on it. I want to print it out for myself, but when I scan it, there is a grey background colour and it makes it difficult to read the text. I have Gimp 2.10.32 for Mac, but I don’t know the program very well. Is there a way to rid the scanned document of the grey background and just show the black text on a white background? If you have a video I could watch or if you could direct me to instructions on how to do it, I’d be very appreciative. Thanks, Dan
Thomas Boldt
Hi Dan, that sounds like a solvable problem, but I’m not sure I understand all the details. It sounds like you’re making a black-and-white scan, and the yellow background color from the menu is being converted into a midtone gray.
If that’s the case, the simplest solution would be to use the Curves tool on your scanned image to turn the gray tone into white. You might lose a little bit of the hinting around the text, but it should still be easier to read.
This might be a bit hard to explain if you’re new to GIMP, but Curves is a very useful tool to learn. I’ll try to keep it simple without going into details =)
With your scanned image open in GIMP, open the Colors menu and click Curves. In the Curves dialog window that opens, you’ll see a large gridded square with a diagonal line running across it from the bottom left to the top right. There is an anchor point at each end of the diagonal line. Click the anchor point in the top right and drag it over toward the left side of the square. You’ll have to gauge how far to move it based on the exact tones in your image, but eventually the gray tone should turn white. If you drag the point too far to the left, the text will start to look weird and eventually it might disappear too, but there should be a ‘sweet spot’ where your grey background becomes white and the text is still perfectly black and legible.
If you want to learn more about the curves tool, I explain more here https://thegimptutorials.com/how-to-brighten-darken-image/
Hope that helps!